Practicing inversions, which are typically defined as a posture where the hips are above the heart and the heart is above the head, is a common goal of many people who practice yoga. Unfortunately, many of the more advanced inversions, if done incorrectly, pose risks that outweigh the benefits. The good news is that there are a variety of postures that are safe for beginners and which make it easier to progress to more advanced inversions. Here is detailed information on how to perform several common inversions, which are generally considered safe for most people.
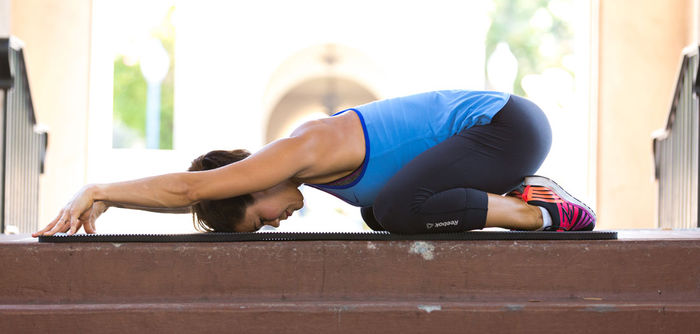
Child’s Pose (Balasana)
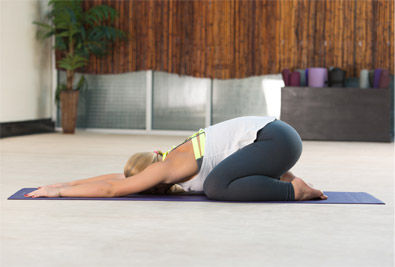
Most people find this very basic inversion posture to be comfortable and it can be held for extended periods of time. From a hands-and-knees position, bring your big toes to touch with the tops of the feet on the ground; position the knees as wide as is comfortable as you sit your hips to your heels. Walk your hands out in front with palms down or bring them alongside your ankles with palms facing up toward the ceiling. If you’re experiencing any discomfort around the knee area, try placing a folded towel or blanket under the knees for added padding or behind the knee crease to decrease the amount of flexion in the knees.
Downward Facing Dog (Adho Mukha Svanasana)
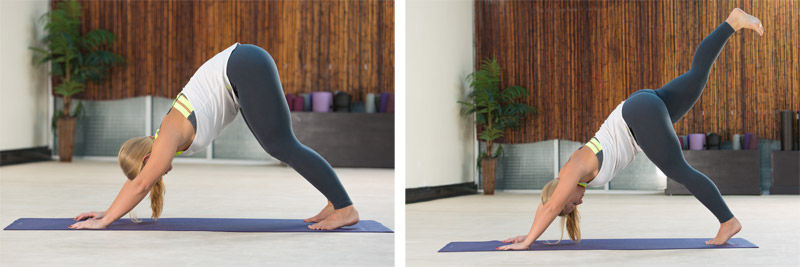
This posture helps develop the arm strength necessary for more advanced inversion postures. Starting from all fours with the fingers spread wide and the middle finger pointing straight forward, tuck your back toes under and lift the hips to the sky into an upside down V-shape. A common misconception is that the legs should be straight. Your legs MIGHT eventually straighten out, but straight legs come secondary to a straight back. If you’re rounding the back and shifting forward to straighten your legs, bend your knees a lot and draw your chest toward your thighs. While keeping that length in the spine, begin to straighten the legs. Play with lifting one leg for a few breaths. Keep the toes of the lifted foot pointed toward the ground (not rotating in or out), and then repeat on the other side. If you’re experiencing any wrist discomfort, come down to the forearms and palms in Dolphin Pose (Makarasana).
Legs Up The Wall (Viparita Karani)
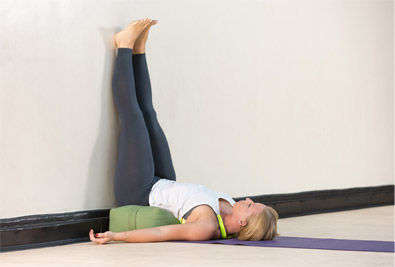
Begin by sitting on the floor next to a wall and placing the right buttock, hip and length of the lateral leg against the wall. Raise the right leg up the wall followed by the left as you lie back on to the floor. You’ll end up in an L-shape between the floor and wall. Scoot your hips as close to the wall as possible unless you’re experiencing discomfort in the hamstrings. If this is the case, scoot the hips away from the wall slightly. To help invert the internal organs, place one or two folded towels or blankets underneath the hips. To progress this pose, move away from the wall and use your core stability to elevate the legs.
Wide-legged Forward Fold (Prasarita Padottanasana)
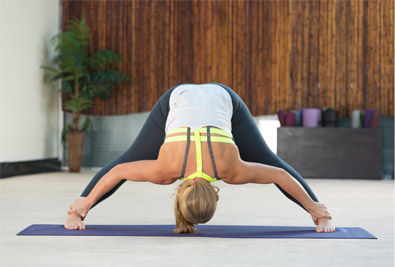
Begin in mountain pose (tadasana) and step your feet apart to a wide stance. Rest your hands on your hips and pigeon toe your feet so that the big toes are turned slightly toward each other. Inhale and raise the arms to shoulder height as you lift your chest and gaze up toward the ceiling. Exhale and begin to fold forward. Stop halfway down and place your hands on the floor. Inhale as you look up and lengthen. Exhale and continue to lower your head in the direction of the floor. Contract the thigh muscles and keep a slight bend in the knee. Choose one of the following arm options: (1) grip the lower legs to gently lengthen the spine and deepen the stretch with each breath; (2) walk your fingertips between the legs back behind you; or (3) bend the elbows and rest the forehead on a block or floor, depending on your degree of flexibility.
If you’re feeling confident with these postures, you may be ready to try something a little more advanced. Here are two postures that will advance you safely and effectively:
Crow Pose (Bakasana)
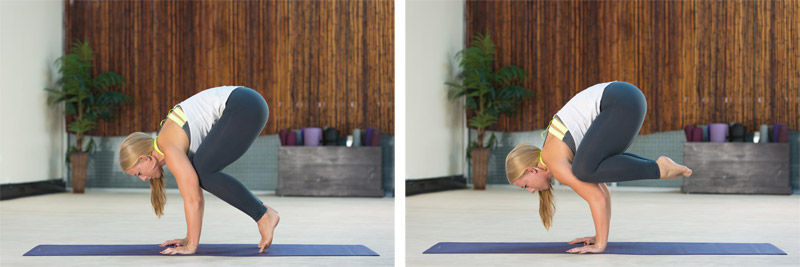
From downward-facing dog pose, walk your feet up and place them behind your hands. Spread the fingers wide and gaze forward. Shift your weight onto your toes and press the knees into the triceps (as close to the armpit as possible). Play with shifting your weight forward into the hands, lifting one foot behind you for a few breaths and then releasing it down to repeat on the other side. The goal is to one day lift both feet behind you and bring the big toes to touch. Release and immediately rest for a few breaths in child’s pose.
Handstand and Forearm Stand Prep
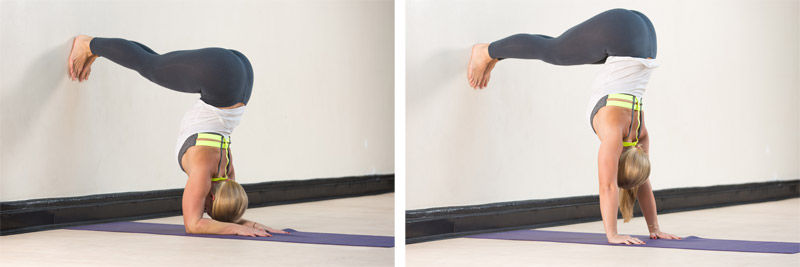
This posture requires the use of a wall, and should only be performed once you feel confident with dolphin and/or downward facing dog. Start from a table-top position, with wrists below the shoulders and knees below the hips. Position yourself so that your feet are a few inches away from the wall. Move into either dolphin pose (forearm plank) or downward facing dog (handstand). Place the feet on the wall and begin to walk the legs up the wall until your hips are at a 90-degree angle (use a mirror or have a partner tell you when you’re there). Engage the core tightly as you press your forearms or hands into the earth and create space between the shoulders and ears (avoid “dumping” into the shoulders). Hold for a few breaths. Play with lifting one leg at a time so that the heel is over the hip. When you’re ready to come out of the pose, walk the feet back down the wall to the floor and immediately rest in child’s pose.


 by
by 



 by
by